Wireless mouse lag: How to Fix Mouse Lag in Windows 10/11? Try These Simple Methods!
How to Fix Mouse Lag in Windows 10/11? Try These Simple Methods!
- MiniTool
- MiniTool News Center
- How to Fix Mouse Lag in Windows 10/11? Try These Simple Methods!
By Vera | Follow |
Last Updated
Mouse lag is a major issue when you are using a wireless mouse. This will have an influence on your user experience and it always appears on Windows 10/11 when switching to this operating system, when it comes to games, etc. Now, let’s read this post from MiniTool and learn how to fix Windows 11/Windows 10 mouse lag.
My Mouse Is Lagging in Windows 11/10
Computer lag is a common issue that has been mentioned in our previous article – 10 Reasons for Computer Lagging and How to Fix Slow PC. In addition, when using a computer, you can also experience another lagging problem – mouse lag.
It often happens when scrolling a mouse cursor with a wireless mouse. This situation is common if you switch to Windows 10/11 operating system or play games. Then, you may ask: why is my mouse lagging. Mouse stuttering or lag is mainly caused by mouse driver, outdated graphics card, Internet problem, etc.
Now, the important thing is fixing the laggy mouse. So, the following is on how to fix mouse lag in games on Windows 10/11.
Solutions to Wireless Mouse Lag
Reinstall or Update Your Mouse Driver
Before starting the issue fix, you can try your mouse on another PC to check whether the lagging issue still occurs. If it works well, it is possible that there is a faulty mouse driver on your computer, causing the lagging mouse in Windows 10/11. Reinstalling or updating the driver could be a solution.
Step 1: Press the Windows logo and X keys to open the Start menu, and then choose Device Manager.
Step 2: Expand Mice and other pointing devices, right-click your mouse driver and choose Uninstall device.
Step 3: Restart your computer and Windows 10 will automatically install a driver.
Alternatively, you can right-click your mouse driver, click Update driver and follow the on-screen instructions to update the mouse driver to fix your lagging mouse.
Update Your Graphics Card Driver
As mentioned above, the mouse lag issue can be caused by an outdated graphics card driver, so the solution is to update this driver. The steps are also very simple.
Step 1: Go to Device Manager (as described in method 1).
Step 2: Click Display adapters, right-click on your graphics driver and choose Update driver.
Step 3: Automatically search for updated driver software and install. After that, check if you have solved Windows 10 mouse lag.
Disable Scroll Inactive Windows Feature
In Windows 10/11, you can simply hover over an inactive window with a mouse pointer and then use the mouse wheel so as to scroll such a window. And the contents of the inactive window can be scrolled. Disabling this feature might be useful to fix the wireless mouse lag issue.
Step 1: Go to Start > Settings > Devices.
Step 2: Under the Mouse tab, locate to the Scroll inactive windows when I hover over them option and turn it off. Then, check if your issue is solved.
End Realtek Audio Process
Realtek audio card might interfere with your mouse, causing the lagging issue. So you can terminate or end the Realtek audio process to fix this problem.
Step 1: Right-click on the Start button to choose Task Manager in Windows 10.
Step 2: Find the Realtek audio.exe process from the Processes tab and right-click it to choose End Task.
Other Options
Now, we have shown you four common methods to fix Windows 10 mouse lag. Additionally, you can try other solutions.
- Disable Cortana
- Disconnect other USB devices
- Change Power Management settings for USB
- Disable Fast Startup
Hope you can easily fix the issue of wireless mouse lag after trying these methods.
About The Author
User Comments :
How to Fix Mouse Lag on Windows 10
A mouse is a key to navigating your device. While many things can be done with only keyboard shortcuts and inputs, you’ll most likely need your pointer to do everything better and faster. However, many Windows 10 users notice that their mouse is lagging, slow, stuttering, or freezing when using their device.
If you have this issue too, continue reading to learn how you can fix mouse lag on Windows 10 within minutes.
Jump to section:
- What is mouse lag and what causes it?
- How to fix mouse lag, freeze, and stutter
- Method 1: Make sure it’s not your mouse itself
- Method 2: Update your mouse driver
- Method 3: Enable or disable Scroll Inactive Windows
- Method 4: Terminate the Realtek Audio process
- Method 5: Change the Palm Check threshold
- Method 6: Set your touchpad to No Delay
- Method 7: Turn off Cortana
- Method 8: Disable NVIDIA High Definition Audio
- Method 9: Connect your mouse receiver to a USB 2.
 0 port
 - Method 10: Use a USB extender
- Conclusion
 0 port
What is mouse lag and what causes it?
The terms “lag” and “lagging” are used to describe a situation when an unusually long time passes between the initiation and completion of a task.
For example, when talking about mouse lag, you might notice that the movement of your mouse pointer is not in sync with your hand movement at all. You might become frustrated because the left and right clicks happen slower, or even notice that your mouse pointer is frozen in place. Some other issues include:
- Mouse lag in games. Many users report that their mouse only seems to lag while playing games. This can be a huge issue for video game lovers, as many popular genres require you to use your mouse.
- Mouse stutter. The mouse stuttering may cause a significant drop in your productivity. It makes everyday tasks much harder to complete, as you need to deal with a slow, sluggish mouse.
- Mouse freezing, not moving. Perhaps the worst of all is when your mouse pointer freezes in place and doesn’t move at all. It doesn’t only give you a scare that your entire system is unresponsive, but makes it hard to figure out what the next step should be.
- Wireless mouse lag. Not even a wireless mouse is free from the lagging issue. However, our steps below should make it simple to fix this issue.
- Mouse input lag. Mouse input refers to pressing any of the buttons on your mouse. Some only have two, the left- and right-click, however many newer models come with extra buttons to help speed up your work. If these buttons aren’t working properly, you might lose efficiency.
Unfortunately, similarly to many other issues with Windows as a whole, there isn’t one definitive cause for your mouse lagging.
How to fix mouse lag, freeze, and stutter
So, the bottom line is that this issue can cause significant performance drop when working, make it impossible to play certain video games, and can set you back in many different ways. Luckily, we have many fixes to help you get rid of this annoyance.
Some of these methods involve hardware changes, while others focus on possible issues with your system itself. We recommend testing the system solutions first, as they can easily confirm where your issue is coming from.
Method 1: Make sure it’s not your mouse itself
The very first thing you should do is check if it’s a problem with your mouse itself.
You can test this easily by disconnecting your mouse, then plugging in a different mouse. Doing this, you can confirm whether or not other models also lag on your computer, or if only one specific mouse has the issue.
Make sure to use the same USB port for each mouse. We’ll be testing different ports later on in Method 10.
Do this as many times as you want to — it’s even possible that only specific brands experience lag, while others don’t.
Method 2: Update your mouse driver
Drivers make it possible to use accessories and core computer parts on your device. If your drivers are outdated or corrupted, you’ll without a doubt run into issues sooner or later.
Here’s how you can quickly update your mouse driver to make sure you’re using the latest version.
- Press down the Windows + R keys on your keyboard to launch the Run utility.
- Type in “devmgmt.msc” and click the OK button. This is going to launch the Device Manager window.
- Expand the “Mice and other pointing devices” category by clicking on the arrow icon next to it. You should see your mouse listed there.
- Right-click on your mouse and choose the Update driver option.
- Choose the option to look for a driver. This will allow Windows 10 to find the latest driver update and correctly install it on your computer.
- Wait and follow the on-screen instructions to update your current driver.
After you’re done updating drivers, it’s recommended to give your computer a restart for good measure. After it boots up again, try and see if your mouse still lags.
Method 3: Enable or disable Scroll Inactive Windows
Windows 10 comes with a feature that allows you to scroll within inactive windows when hovering your mouse pointer over them. Many users report that this feature often causes issues with the mouse, however, they also report that turning it on fixed lag.
Depending on whether or not you have it enabled, follow the appropriate steps to either enable or disable your Scroll Inactive Windows feature.
Step1: Click on the Windows icon in the bottom left of your screen, then choose Settings (indicated by a gear icon). You can also use the Windows + I shortcut to launch the app.
Step 2: Click on the Devices tile.
Step 3: From the menu on the left side, choose Mouse or Mouse & Touchpad, depending on if you’re using a PC or a laptop.
Step 4: You should see an option called Scroll Inactive Windows. Click on the switch under it and either enable or disable the feature.
Step 5: Check if your mouse still lags. If it does, restart your computer and check again.
If Scroll Inactive Windows is a feature you can live without or one that you don’t mind turning on, this fix can solve your mouse lag quickly. However, many people prefer to keep their systems configured the way they are used to it. That is why we still have many options to troubleshoot mouse lag on Windows 10.
Method 4: Terminate the Realtek Audio process
Something that might work when fixing mouse lag issues is disabling the Realtek Audio process. If you use an NVIDIA part, you might also try Method 8 to disable the NVIDIA High Definition Audio component.
- Right-click on any empty space in your taskbar and choose Task Manager.
- If the Task Manager launches in compact mode, click on the More details button in the bottom left of the window.
- Make sure you’re on the Processes (default) tab.
- Under Background Processes, locate and select Realtek HD Audio Manager.
- Click the End task button that becomes available in the bottom right of the window once the process is selected.
- Test if your mouse still experiences lag issues.

Method 5: Change the Palm Check threshold
This method is intended for those who use a trackpad or touchpad, for example on a laptop or an external one for your PC.
Note that not every computer is equipped with the same drivers. We can’t give you a detailed guide on this method that will 100% fit your device settings. However, the steps below follow the streamlined process of changing the Palm Check threshold on most laptops.
- Click on the Windows icon in the bottom left of your screen, then choose Settings (indicated by a gear icon). You can also use the Windows + I shortcut to launch the app.
- Click on the Devices tile.
- From the menu on the left side, choose Mouse & Touchpad.
- Click on the Additional mouse options link at the bottom of the page.
- Choose the TouchPad or ClickPad tab at the bottom of the Mouse Properties window.
- Click on Settings. This will open up a control panel. When it’s open, find a tab for Advanced settings.
- Locate the Palm Check Threshold control, and move it all the way to the minimum value. The example below is from the Synaptics Control Panel.
- Click OK.
 You can also use the Windows + I shortcut to launch the app.
Now, test if your mouse works as intended! You can always reset these settings by going back into the same tab and changing the value to what’s comfortable for you.
Method 6: Set your touchpad to No Delay
Another solution for trackpad users is setting the delay before your cursor moves to none. This feature is implemented into Windows 10 to ensure your cursor doesn’t accidentally move while you type, however, for many users it’s more harm than good.
Here’s how you can turn it off.
- Click on the Windows icon in the bottom left of your screen, then choose Settings (indicated by a gear icon). You can also use the Windows + I shortcut to launch the app.
- Click on the Devices tile.
- From the menu on the left side, choose Mouse & Touchpad.
- Under Touchpad, make sure you set the delay to No delay (always on).
- Test if your mouse works correctly.
Method 7: Turn off Cortana
It may seem like a totally unrelated feature, but many Windows 10 users have reported that Cortana, Microsoft’s virtual assistant, seems to cause mouse lag. If you currently have Cortana enabled, we recommend giving this solution a try. After all, if it didn’t help, you can always turn Cortana at any time.
Here’s how to turn off Cortana on Windows 10.
- Click on the Cortana icon in the taskbar, then choose Settings (indicated by a gear icon).
- Make sure that you’re on the Talk to Cortana tab.
- Turn every Cortana option Off. This will ensure that its services are completely turned off.
- If you want to, you can hide the Cortana button from your taskbar by right-clicking on it and choosing the Hide Cortana button option.
- Test if your mouse is working correctly now that Cortana is turned off.
Method 8: Disable NVIDIA High Definition Audio
Similarly to an earlier method involving a different audio manager application, you might have mouse lag issues because of NVIDIA’s High Definition Audio process. It’s extremely easy to disable, so it might be a quick and easy solution to many.
- Right-click on an empty space in your taskbar and choose Task Manager.
- If the Task Manager launches in compact mode, click on the More details button in the bottom left of the window.
- Make sure you’re on the Processes (default) tab.
- Under Background Processes, locate and select Realtek HD Audio Manager.
- Click the End task button that becomes available in the bottom right of the window once the process is selected.
- Test if your mouse still experiences lag issues.
Method 9: Connect your mouse receiver to a USB 2.0 port
Even if the issue isn’t caused by your mouse itself, it’s possible that something is wrong with the USB port it’s connected to.
Especially with the newer USB 3. 0 ports rolling out, it’s possible that you’ve plugged your mouse into the wrong hole. Not every computer accessory is capable of functioning properly with the USB 3.0 port, which means you need to make sure you try plugging it into a USB 2.0 one.
It could also be that the USB port you’re using is damaged. Make sure to test it with other accessories such as a keyboard or a pen drive.
Method 10: Use a USB extender
Some users report that they have mouse lag issues on Windows 10 due to poorly configured power settings. This can be fixed easily by following the next few steps.
- Press down the Windows + R keys on your keyboard to launch the Run utility.
- Type in “devmgmt.msc” and click the OK button. This is going to launch the Device Manager window.
- Expand Universal Serial Bus controllers by clicking on the arrow icon.
- Right-click on a USB Hub and select Properties from the context menu.
- Switch to the Power Management tab.
- Make sure to uncheck the “Allow the computer to turn off this device to save power” option.
- Click OK and test if your mouse works properly.
Conclusion
We hope that this guide was able to resolve your issues with the mouse lag on Windows 10.
If you’re in need of information about other Microsoft Windows issues, need help with troubleshooting, or want to learn more about your operating system, check out our other articles here.
However, if you’re looking for a software company you can trust for its integrity and honest business practices, look no further than SoftwareKeep. We are a Microsoft Certified Partner and a BBB Accredited Business that cares about bringing our customers a reliable, satisfying experience on the software products they need. We will be with you before, during, and after all the sales.
One more thing
We’re glad you’ve read this article upto here 🙂 Thank you for reading.
If you have a second, please share this article on your socials; someone else may benefit too.
Subscribe to our newsletter and be the first to read our future articles, reviews, and blog post right in your email inbox. We also offer deals, promotions, and updates on our products and share them via email. You won’t miss one.
Read also
> Two Finger Scroll Not Working Windows 10 (Fixed)
> How to fix Windows 10 scrolling by itself
> How to Change Your DPI Mouse in Windows 10
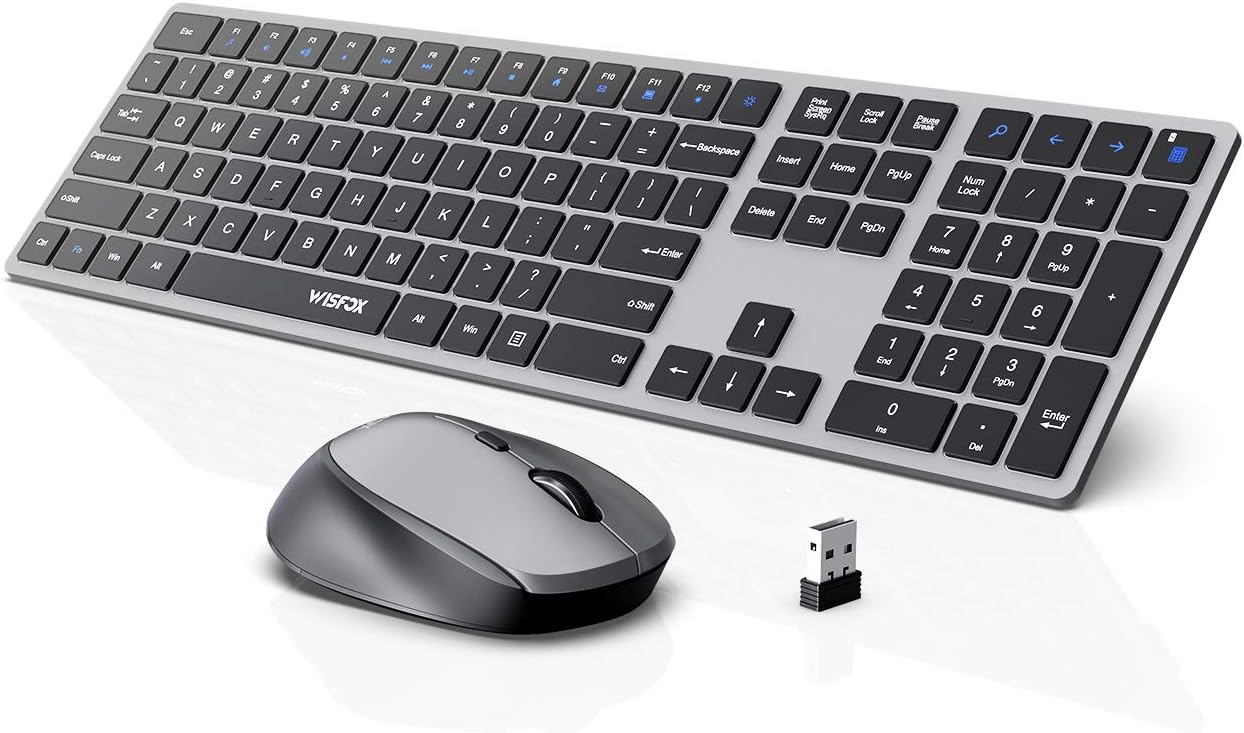
Should I switch to a wireless mouse
Are wireless mice advanced enough to keep up with wired mice?
Wireless mice are more common than ever and it can be difficult to tell how they are different and similar compared to a traditional wired mouse.
Here’s an introductory explanation of wireless mice, how they work, and trade-offs with their wired counterparts.
Contradictions
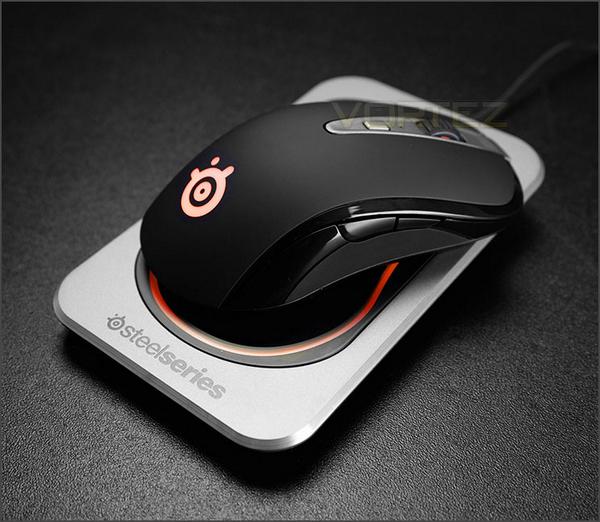
Rival 650
A few years ago, when wireless mice like the Rival 650 were in their infancy, I spent some time talking to gamers about wireless mice.
This was a surprisingly controversial topic.
Someone was really excited about the prospect of a wireless version of their favorite mice. Others looked at it with a mixture of horror and disgust, explaining why they would never buy a wireless mouse, citing the risk of losing signal or power in the middle of a game.
Of course, as with most controversial topics, there were a large number of people who didn’t really have an opinion on the matter.
What’s important in a mouse
Before we can talk about the advantages of wired and wireless mice, we need to have a basic understanding of what makes a good mouse.
Think about what is important to you in mice. One of the most common answers to this question is ergonomics.
If you’re going to play with a mouse for six, ten or twelve hours at a time, you’ll want the mouse to feel good and natural in your hand.
Most of us have experienced the awkwardness and distraction of an uncomfortable mouse.
A good mouse should feel so natural you might even forget it’s there – a true extension of your hand.
Wireless mice should be no different in terms of ergonomics – what works for wired mice also applies to wireless mice.
The second thing people often value is performance, and this is where most of the doubts about wireless mice come from.
Unfortunately, whether it works or not, “performance” can be a relatively abstract concept, and the average consumer can’t usually appreciate it at a super-detailed or specific level unless something clearly went wrong. Manufacturers will post specifications, but without some context, it can be difficult for most people to determine what truly has an effect.
Measuring mouse performance
The best definition of mouse performance is that a high-performance mouse should “represent the movement of my hand as accurately as possible on the screen. ”
”
This is usually achieved in three ways:
- Sensor accuracy
- Delayed firmware
- Polling rate for PC connection
For example, the Rival 650 mouse has the same sensor as its wired counterpart, the Rival 600, so sensor performance is maintained.
However, moving to wireless can have a profound effect on latency and polling rate, which we’ll discuss below.
Latency
Mouse latency is measured as the amount of time it takes for your hand movements to reach the PC.
This number is important because if the latency gets too high, your mouse will become laggy or late.
This shaking sensation can be really harsh and unnatural and even cause motion sickness.
Because of this, the firmware developers work very hard to keep latency to a minimum, so there is a minimal amount of time between your mouse action and the on-screen reaction.
Polling rate
The minimum delay that a device can have is determined by the so-called polling rate.
The polling rate is a measure of how often the PC “asks” the mouse if it has any data.
The polling rate is usually negotiated between the OS and the mouse when the mouse is first connected. The polling rate is usually measured in hertz: a polling rate of 1000 Hz means that the device is polled 1000 times per second, hence the polling rate is 1 ms.
If the device is polled at 500 Hz, this means that the minimum delay is 2 ms.
The polling rate affects not only latency but also the smoothness of your cursor. This is because the polling rate also determines how many patterns the PC receives from the mouse.
Basically, more patterns (1000 per second) equals more parts.
That’s why SteelSeries USB mice use 1ms polling by default and are so popular with competitive gamers.
Cord cutting
So now that we have a good baseline to measure performance with sensor, firmware and polling rate, let’s see how performance is affected by moving to wireless…
Is Bluetooth an option?
As mentioned above, SteelSeries USB mice have a default polling rate of 1000 Hz, which is the maximum supported by a full speed USB connection. By comparison, the maximum polling rate supported by Bluetooth is 125Hz or less when other variables are taken into account.
This means that Bluetooth latency is at least 8 times higher than the equivalent USB device.
This drastic reduction and change in polling rate affects the smoothness of the mouse so much that in many cases it more than negates the effectiveness of a high quality sensor.
In short, Bluetooth is not a valid wireless solution for mice (just as it is not the best solution for high quality wireless audio!)
Dongle solution
So if Bluetooth isn’t an option, what is?
As with wireless headsets, wireless mice come with a special dongle that uses its own RF protocol, providing significantly lower latency than Bluetooth. As a result, a wireless mouse can provide more bandwidth and lower latency while maintaining the same 1ms polling rate as a wired mouse.
How to deal with interference
One of the big problems that all wireless devices can face is interference from other devices.
Wired devices are effectively protected by their wire, which means that no two wired devices will interact with each other as they are not physically touching each other.
All wireless devices operate in the same space, and if two devices try to communicate on the same frequency at the same time, interference will occur.
Almost all wireless mice on the market operate on the 2.4 GHz ISM band. This is a set of 80 frequencies from 2.4 GHz to 2.5 GHz in the electromagnetic spectrum.
This frequency band is used by many Wi-Fi routers and all Bluetooth devices.
So if you have a lot of people in the room, you will have more interference.

This frequency range is also used by microwave ovens, so even an old microwave oven without much protection can affect wireless performance.
So we’ve found that the 2.4 GHz band is very noisy and devices must be able to compensate for this.
In general, there are two ways to deal with this:
- Frequency hopping: a circuit in which both the device and the dongle agree on a list of frequencies, and they switch between this list. This means that if any one frequency is busy, devices can switch to a quieter channel.
- Creation of a protocol with confirmations. For example, in Rival 650, all packets sent from a mouse must be validated with a dongle. If the mouse does not receive an acknowledgment, it resends its data. If you want to provide a certain delay, you need to send packets at least twice as fast. With this, you can recover a missed packet and never “lose” or “drop” data due to interference.
Wireless Mouse Power
With wireless devices, the more data you transfer, the more power you use.
This means that high performance, low latency mice will consume more power than conventional Bluetooth mice.
To make up for the power consumption, wireless gaming mice need a good built-in battery that adds weight. This can be a problem for some people, so if you prefer an ultra-light mouse, a wireless mouse might not be the best choice for you (at the moment).
If you’re over the battery life of your mouse (or headset), you can turn off all the LEDs or have them turn off after a certain amount of time without use, which saves a lot of battery life (similar to turning the brightness down on your phone).
A good wireless mouse can also be used while plugged in, so a low battery should never slow you down.
So it works
Some of the biggest complaints about wireless mice have to do with performance and power concerns, but new developments and technologies have helped wireless mice redirect and overcome those concerns and create efficient, affordable wireless mice. It not only works, but it works just as well as its wired counterpart.
Author of the publication
How we measure the delay of the mouse button
Review of existing methods conditions, performance in games will be higher, especially in very dynamic games. Determining this delay, based on subjective feelings, is at best only qualitative, which makes it difficult to objectively compare gaming mouse-type controllers.
Among gaming peripheral reviewers, perhaps the most common way to measure mouse button latency is by using Nvidia’s Latency and Display Analysis Tool (LDAT). The kit consists of a slightly modified (more on that below) Logitech G203 Prodigy mouse, the LDAT sensor itself, and a USB 2.0 cable with type A and Micro plugs.
On top of the sensor there is a signal LED and a connector for connecting a cable from the mouse microswitch. Below is a window behind which there is an optical sensor. On one end there is a Micro-USB connector, on the other there is a 3.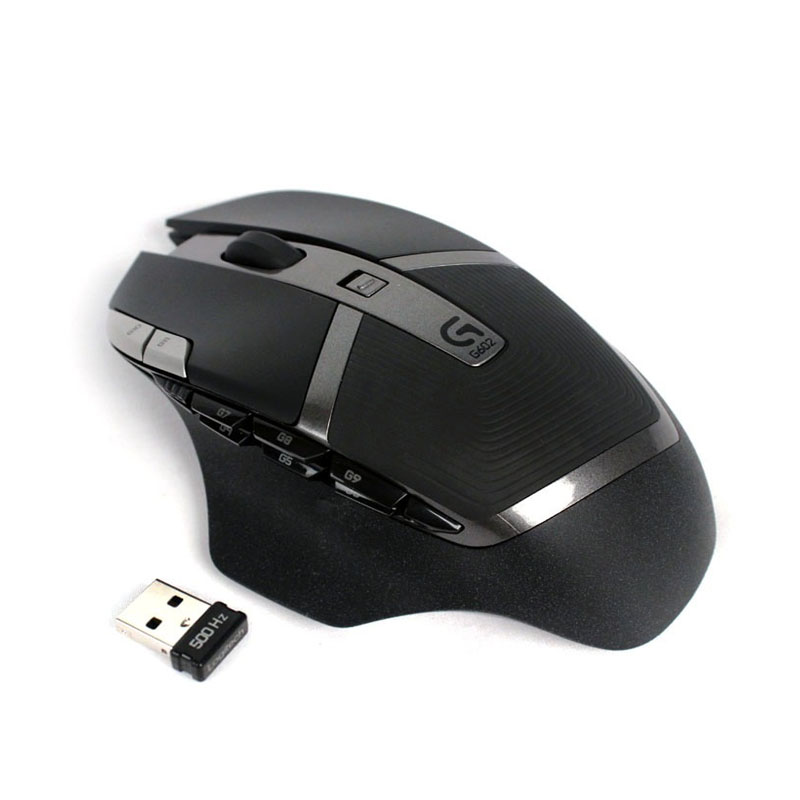 5 mm mini-jack microphone connector.
The moment of pressing the button is determined by the actual closing of the mouse microswitch contacts (which requires disassembling the mouse and soldering wires to the microswitch pins; the mouse from the kit is already modified in this way) or by the click sound that is heard when the mouse button is pressed (you need to connect a microphone). The moment of the end is determined by the change in brightness on the screen area, for example, from the flash of a shot made in the game. On the screen, the sensor is fixed with an elastic cord.
Nvidia offers a special program for processing data from the sensor, it can also be used for tests instead of games – a large area of \u200b\u200bthe window changes brightness, simulating a flash from a gunshot. It also has an automatic mode, in which the contacts of the mouse button are closed by the LDAT sensor itself with a specified frequency.
There are at least two negative aspects of this technique. First, you need LDAT. Secondly, in this way the total delay is determined, which is contributed by too many software and hardware stages of signal processing and transmission. The second makes it difficult to determine the contribution of the mouse itself and makes it difficult to compare results obtained under different conditions – for example, when using different monitors and versions of graphics drivers (or their settings).
We tested three mice using the MSI Oculux NXG253R gaming monitor, which features a very high refresh rate (360Hz) and low output lag (2.7ms according to our data). Using LDAT, we determined the average value of the total delay, and subtracted the monitor output delay from it. The results are presented in the rightmost column with the heading “LDAT: delay, ms (Delay, ms)” in the table below and in the diagram.
The second column with the heading “Delay, ms (Delay, ms)” and also in the diagram shows the results obtained on our bench of the second version – see below. It can be seen that the difference between the delays determined by the two methods is from 4.2 to 4.7 ms. This is the value of total system latency minus mouse and monitor latency. It turns out that with the help of LDAT, it is possible to compare mice with each other with a fairly high accuracy if tests are carried out under the same conditions. However, this is not indicative, since the overall system latency is quite high compared to the mouse latency in the case of fast manipulators. In addition, with any change in the system, even after installing new drivers, you need to conduct repeated tests, and, if necessary, adjust the results.
Note that in the case of a new version of the LDAT sensor, apparently, it is possible to determine the delay of the mouse, apparently, not by a flash on the screen, but by the arrival of a system message. However, the prospects that we will have this sensor are not very optimistic. Looking ahead, we point out that the principle of operation of such a new LDAT sensor is exactly the same as that of the first version of our test bench – see below.
There is another option: the team from rtings.com uses the click sound of the button as the start of the measurement, and the end is also determined by the registration of the event, and not by the flash on the screen.
Thus, to determine the delay of just pressing the mouse button, the beginning of the event is determined by the closure of the mouse contacts (either the closure itself is recorded when the button is pressed or the moment of closure with the help of a remote controller) or by the sound of a button click, and the end is determined by the arrival of the system messages.
The first version of the stand
Developing our method for measuring the delay of the mouse button, we decided to abandon the use of a microphone. At the first iteration, we also abandoned the mechanical closure of the microswitch contacts – let the control controller close the outputs. For the latter, we used what was at hand, namely the Seeeduino Xiao module, based on the SAMD21G18 microcontroller, now manufactured by Microchip.
Correspondence of the module pins to the microcontroller pins (hereinafter the reference will be to them) shows a fragment of the module diagram below:
Sven GX-950 Gaming became an experimental mouse. We took it apart:
And soldered two wires to the microswitch contacts of the left button:
To avoid possible mutual influence of the mouse controller and the control module, the contacts were closed using a phototransistor, that is, with galvanic isolation. The diagram is shown below:
And assembled module:
Plus and minus on the pins of the microswitch can be easily determined using a multimeter on a connected mouse, and in this case, the “minus” contact was also zero.
The delay measurement in this case is as follows:
- The PC program sends a command to the Seeeduino Xiao module to press the mouse button via USB.
- The Seeeduino Xiao module, through the phototransistor module, closes the mouse button and starts the delay countdown timer.
- During USB polling, the mouse on the PC sends a button press event, which is passed to the program by the system as a WM_LButtonDown (or WM_LButtonDblclk) message.
- The program, having received these messages, sends a command to the Seeeduino Xiao module to complete the delay measurement via USB to the Seeeduino Xiao module.
- The Seeeduino Xiao module stops the delay countdown timer and sends the timer value to the PC program, which is converted into milliseconds by the program.
In the case of our test mouse Sven GX-950 Gaming, the average latency for 100 measurements was 28.7 ms, the minimum was 24.1 ms, and the maximum was 33.9 ms. This is for the standard 125Hz polling rate.
The second version of the stand
However, it seemed to us that disassembling the mouse and soldering the wires every time is too expensive, so we decided to exclude this stage. Without disassembling the mouse (and without using a microphone), the only option left is to press its button in a regular way, but by doing it on command with a minimum delay. A person cannot be trusted with such a function, so a mechanized finger comes to the rescue. One of the fastest and most affordable drives suitable for this task is the hard disk drive. Based on it, a stand with a mechanized finger was made:
The actuator with a fixed rubber head is fixed on threaded posts with the help of corners, which allows you to finely adjust its height relative to the mouse.
An angled steel stop and glued-on rubber strips hold the mouse in place and prevent it from moving during a series of button presses. Stand with mouse Sven GX-950 Gaming:
And in the case of a smaller mouse, A4Tech G7-630:
After some time, the design of the stop was changed so that even in the case of large mice, the stop could be moved far enough and the striker fell to the edge of the button petal. Now the stop is a piece of plywood, moved with effort along steel rails:
The base also purchased rubber feet, which were used bottle caps:
General view of the updated booth:
The robotic finger, under its own weight, descends to contact with the mouse button, which actually corresponds to the position of the relaxed finger of the user. To press, it is enough to apply a current pulse of the desired polarity to the drive coil, and in the absence of current, the “finger” will return to its original position. This made it possible to get by with the simplest drive with one transistor. His scheme:
And implementation:
Reverse side:
Since a long-term supply of 12 V voltage greatly heats up the drive coil, the maximum pulse duration was software-limited to an interval of 250 ms, but during normal operation, voltage is applied to the drive for no longer than a few milliseconds. The maximum pressing force on the mouse button before the microswitch actuated, among those mice that we had access to, varied from 0.6 to 0.9 N. The static force developed by the finger of the stand was at the level of 0.75 N, which, taking into account the kinetic energy gained during the movement was enough to trigger the buttons of all tested mice.
The general wiring of all units is shown below (12 V power supply for the Driver is not shown):
Connecting to the mouse microswitch contacts is optional in this case, and is used only if you need to determine the delay from signal transmission to the drive (HDD Head) until the microswitch contacts close.
The video below demonstrates the operation of the stand in the case of a cycle of 10 clicks.
With mechanical finger and in case of Sven GX-9 mouse50 Gaming (shown in the video), the average latency for 100 measurements was already 33.8 ms, the minimum was 28.4 ms, and the maximum was 39.3 ms. Latency has increased as it takes extra time for the actuator to actuate and the mouse button to free-travel. However, from our point of view, this reflects the real situation better, since the user’s finger usually rests freely on the mouse button, and does not push it in advance almost until the moment of operation. Soldered wires still allowed using Seeeduino Xiao to determine the delay from signal transmission to the drive until the microswitch contacts close. In case of Sven GX-9 mouse50 Gaming, this delay was about 4.5 ms, and, looking ahead, in the case of a very low latency mouse (Corsair Katar Pro), this delay is less, about 3.75 ms (in the case of the Logitech G203 Prodigy, even less – 3. 2 ms ), which may be due to a shorter stroke of both the microswitch itself and the body tab on which the user’s finger rests.
The delay measurement algorithm for the mechanical finger version is as follows:
- The PC program sends a command to the Seeeduino Xiao module to press the mouse button via USB.
- The Seeeduino Xiao module energizes the drive coil through the driver module and starts the delay countdown timer.
- Optional (if wires are soldered to the button): at the moment of closing the contacts of the button, the value of the timer is remembered.
- While polling via USB, the mouse sends a button press event to the PC, which is passed to the program by the system as a WM_LButtonDown (or WM_LButtonDblclk) message.
- The program, having received these messages, sends a command to the Seeeduino Xiao module to complete the delay measurement via USB to the Seeeduino Xiao module.
- The Seeeduino Xiao module stops the delay countdown timer and sends the timer value to the PC program, which is converted into milliseconds by the program. Optionally, the first stored value of the timer is also passed, which is converted to milliseconds.
 Optionally, the first stored value of the timer is also passed, which is converted to milliseconds.
 The window of the control program after the completion of the measurement of both delays:
The measurement procedure is as follows:
- All preparatory work is performed: installing the mouse on the stand, selecting the mouse operation parameters, connecting the Seeeduino Xiao module via USB and 12 V power to the driver, starting programs, etc.
- The program selects the number of tests (usually 100), the delay between tests (500 ms is enough for the mechanical finger to rest on the mouse button after pressing and releasing), and whether to measure the first delay.
- The mouse cursor is placed on a pale yellow field (although it can be placed on any empty space in the window) and the “Start!” button is pressed using the keyboard.
- At the end of the measurement cycle, the Delays window displays the average, minimum and maximum values for one or both delays, as well as a list of the delays themselves (the first one is displayed on the right).

Materials on the topic, including the source code of the control program and firmware of the microcontroller module, are available on github. Work is still in progress, so the current version may differ from the above, and the description may be missing.
Preliminary results
To test the work of the stand, we tested several mice that were in the nearest access. The results are shown below (RF stands for RF with factory receiver; lowest average latency among tested mouse settings).
These mice can be conditionally divided into four groups according to the delay: very fast (about 6 ms), fast (about 10 ms), medium (less than 20 ms) and slow (above 25 ms). It is difficult to predict how much the difference between these groups will affect in a real game, but for very dynamic games at a high frame rate, I would like to recommend mice only from the first and second groups, that is, with a delay (determined by our method) no more than 10 ms.
In the case of gaming mice, as a rule, in the settings you can select an increased polling frequency, in our case up to 2000 Hz. Let’s look at the example of three Corsair mice, how the delay is affected by the polling rate:
It can be seen that there is practically no difference between 2000 and 1000 Hz. Between 1000 and 500 Hz there is a difference rather than not. Between 500, 250 and 125 Hz the difference is significant. But in any case, for very fast mice, even in the case of a minimum polling rate of 125 Hz, the delay is still very low. It is noteworthy that the RF interface in this case increased the delay only slightly.
Reasoning about the polling rate of 2000 Hz and above
As we were told in the comments to the first version of this article, in the case of Full-Speed USB devices (and all mice from the list above are exactly like that), the polling frequency cannot exceed 1000 Hz. With an alleged frequency of 2000 Hz, the polling actually occurs at a frequency of 1000 Hz, but two sets of coordinates (and, apparently, button states) are transmitted in the packet. The mouse driver processes this packet and issues two sets of messages to the system at short intervals. In theory, it is possible that the second set is obtained by extrapolation, and not from actual data. Actually, therefore, there is no difference in delay between 2000 and 1000 Hz.
The MouseTester program allows you to identify the described case with two sets in one package. To do this, you need to plot the dependence of the update interval on time. Let’s show this on the example of the Corsair Dark Core RGB Pro mouse. First, the graph for the polling rate of 500 Hz:
It can be seen that the messages arrive after 2 ms with a very small spread. Now for 1000 Hz:
The spread is also negligible. And for 2000 Hz:
In this case, there is a repeated deviation after one coordinate update up and down from 0.5 ms. This proves that the packets arrive every 1 ms, and the driver issues one coordinate update, for example, immediately, and the second after an interval greater or less than 0.5 ms.
Conclusions
In the case of very dynamic games and with a high image refresh rate, the result is likely to be significantly affected by how long it takes from clicking on the mouse button to making a shot.