Cleaning a pc: How to clean your computer
How to clean your computer
When you purchase through links on our site, we may earn an affiliate commission. Here’s how it works.
(Image credit: Future)
You can configure your fans however you like, use as many dust filters as you can fit, and make sure your PC is well away from carpets and floor-bound fluff, but at some point, the dust comes for us all. You can’t escape it, and it’s a good idea to clean your PC now and then if you want to keep your components’ temperatures manageable. Here are the methods we use to safely and thoroughly clean out our computers.
How to clean you PC
The most important thing to consider when cleaning your case is that we want to make it possible for cool, fresh air to get into the case and hot air to get out. If dust filters are clogged or there’s excess dust collected around the heat sinks, that’s not going to be possible and your system could overheat.
To counter that, you want to do everything you can to eliminate dust and leave your system fresh and clean.
(Image credit: Future)
Note: Whenever cleaning your PC or its components, you need to take extra special care about static damage. Using an anti-static wristband is ideal, but if you don’t have one to hand, make sure to regularly ground yourself by touching your case or PSU housing.
Before you start
- Wear a dust mask or respirator if you want to avoid breathing in any of the dust and dirt you remove from your case.
- Turn off your PC and unplug the power cable from the rear. If you want to be extra safe, unplug everything.
- Move your computer to somewhere well ventilated if possible, or at least open a window or door to let fresh air into the room.
- Remove the side panels and (if possible) the front panel of your case.
Tools to help
(Image credit: Future)
- Microfibre cloth – You might want to rub something in there.
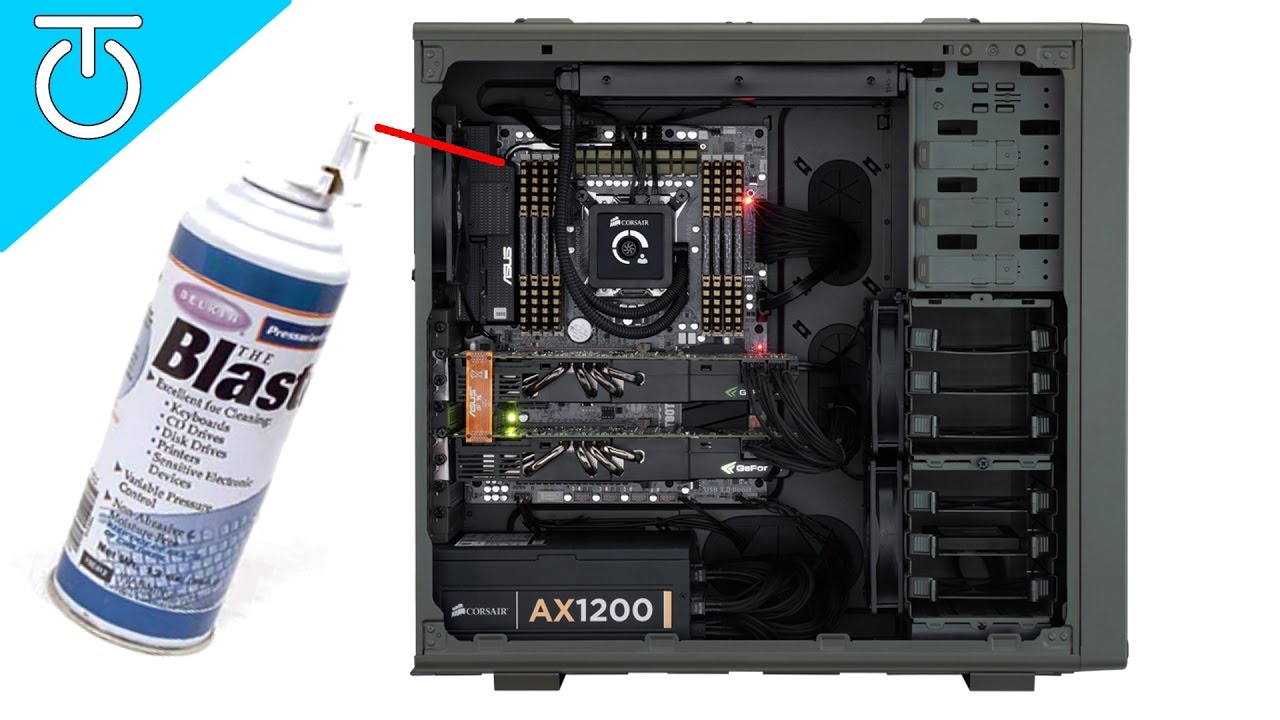
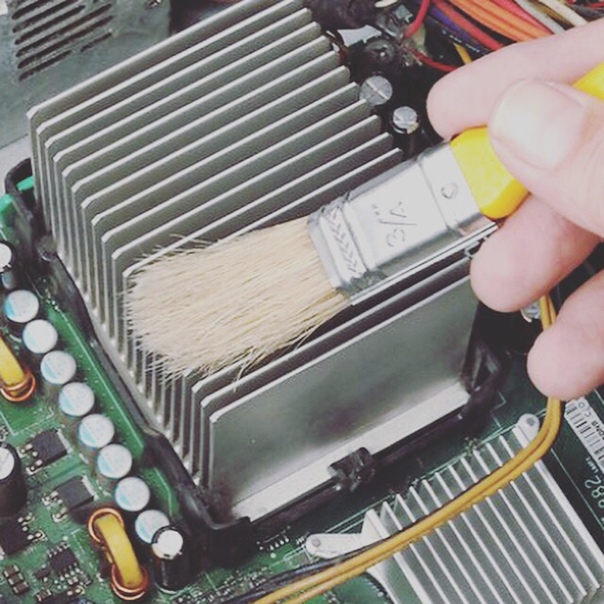
- Compressed air – let’s face it, if you want to clean anything on a PC one of these is always good to have on hand.

- A mini vacuum/blower – If you’re sick of buying compressed air you can get one of these pretty cheap. They’re not as direct or as powerful but they’ll do the job and you can just recharge it instead of needing a new can.
- Antistatic wristband – You can use your case to ground you, but one of these is never a bad idea.
- Actual tools – depending on your case and parts, you might need screw drivers or special bits to get things open.
How to clean your PC
1. Get rid of the dust — Dust is one of the biggest enemies when it comes to keeping a PC clean, and it can get everywhere.
You’ve likely already knocked loose a bunch of dust just moving your PC, use a vacuum cleaner to clean up any dust that ends up on the floor. However, don’t use the vacuum directly on the interior of your case, as there is a real risk of static damage.
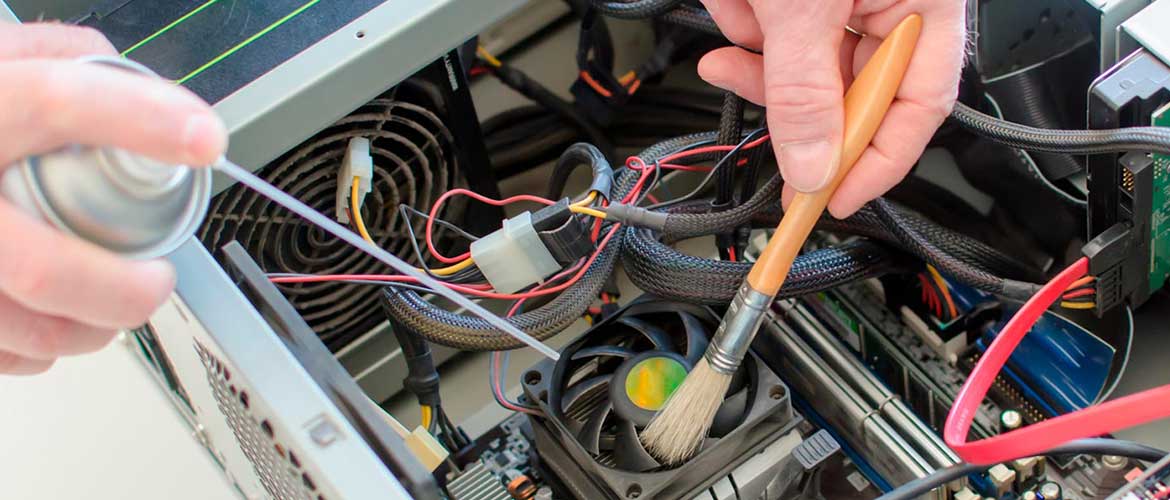
Use your can of air, or blower to get as much dust out of your PC as possible. You can often do a pretty good clean without needing to remove any components this way.
If your PC hasn’t been cleaned in a while, there’s a good chance you have dust caked onto the fans, vents, and heat sinks. In this case, a quick dusting might not be enough.
(Image credit: Future)
2. Remove everything you want to clean —If you display your PC like a work of art as much as a functional tool or gaming machine, then you’ll want to do more than just give it a light dusting. For that, we’d recommend removing everything from the case. That means redoing all of your cable management, draining the water-cooling loop, and unhooking all your drive caddies. The end result, though, is worth it.
Note: We still recommend an anti-static wrist band when handling any components. If you don’t have one to hand, periodically touch your PC case to ground yourself.
If there’s only a few things that need the intensive clean treatment, feel free to just grab those out. That being said, it’s worth doing a thorough clean now and then and now’s as good a time as any. Just make sure you reapply thermal paste if you remove the heat sync. If you’re not sure how, read our guide.
3. Lay it out —Lay everything you’ve removed out on a non conductive surface. This should give you a good opportunity to see what really needs your cleaning attention. You can give them another once over with the compressed air or blower while they’re here.
(Image credit: Future)
4. Wipe everything down — Grab your lint free cloth and wipe any dust build up you can still see. Pay particular attention to any crevices, plastic shrouds, and heat sinks. Thoroughly clean any dust filters too. For fans you can hold the blades still to give them a better clean on the individual blades.
5. Use some Isopropyl — If there are any fingerprint or oily marks or other stubborn grime, use cotton swabs and isopropyl alcohol or equivalent to wipe them clean. Be very careful and of course, make sure to leave them to dry before putting them back together.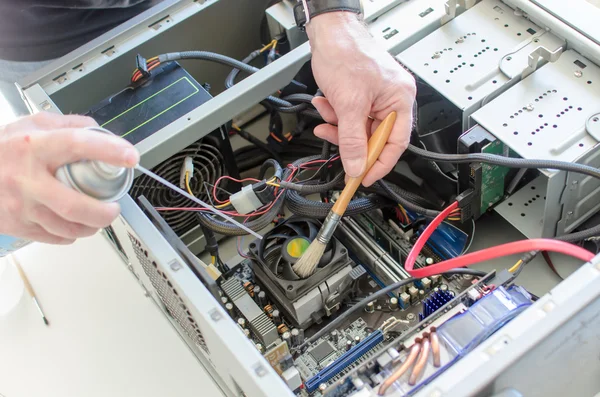
6. Opening components — Some components, like a graphics card, can get dust build-up inside a covered area. Cleaning these may require disassembling the card, which is possible if you have the right tools (small hex and Torx bits are often required). Hopefully this won’t be required, but if your PC has been extra dusty there might be some caked inside.
(Image credit: Future)
There are certain components, like the interior of your PSU, that you aren’t going to be able to clean effectively without taking it apart and voiding your warranty. Doing so can be dangerous, too. Instead, we’d recommend using a can of compressed air with a long straw attached to give it a little blast to dislodge any stubborn dust. When you next turn it on, its own fan and natural airflow should blow any loosened dust out of the rear.
When you’re finished cleaning, put everything back together. Take this opportunity to do a little cable management as it can help avoid dust build up by making for a cleaner passage of air through your system.
How often should I clean my PC?
To maintain a healthy system, we recommend a light dusting at least every three to six months, or more often if you have pets or live in an especially dusty environment. For deep cleanings, every six months to a year is recommended if you want to maintain peak performance, or every couple of years at the very least to avoid any potential overheating issues.
Sign up to get the best content of the week, and great gaming deals, as picked by the editors.
Contact me with news and offers from other Future brandsReceive email from us on behalf of our trusted partners or sponsors
How to clean your PC system
Search Kingston.com
To get started, click accept below to bring up the cookies management panel. Next, tap or click on the Personalization button to turn on the chat feature, then Save.
Your web browser is out of date. Update your browser now for better experience on this site. https://browser-update.org/update-browser. html
html
Sep 2021
-
Gaming
-
PC Performance
-
System Builders
-
DIY PC
-
Kingston FURY
Blog Home
Have you noticed that dust is starting to build up on your gaming system causing it to overheat? All gaming computers are susceptible to dust and dirt, and if you put off cleaning your system for too long, you might end up damaging your components and impacting your gaming performance. It’s inevitable that dust will end up in your system, whether you use it all the time, or play once a week, gaming computers love dust. We suggest you clean your computer every three to six months to keep your system looking its best and to prevent a significant reduction in your PC’s lifespan. It’s also a good idea to take the time to clean up the inside of your computer, such as deleting any old files or applications or even installing a fresh copy of Windows. Cleaning your system is not as hard as you might think! Check out our step-by-step guide below.
Physically cleaning your computer
- Turn off your PC and unplug the power cable. This will ensure your safety.
- It’s a good idea to move your PC to somewhere well ventilated, otherwise, any dust you remove will settle back on the computer.
- The dirtiest parts of a case are usually the top and bottom since this is where the dust settles. Wipe down the exterior of your case with a damp cloth.
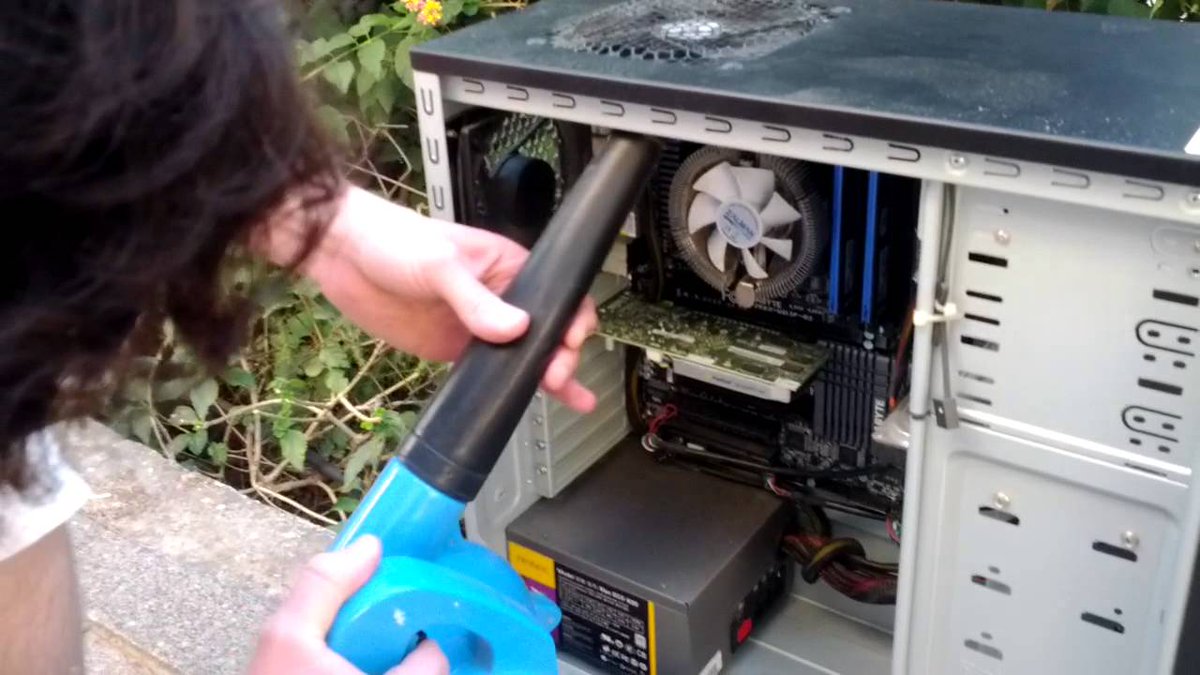
- The insides are a little trickier. The best thing to use to remove dust is a can of compressed air. Remove the side or front panels of the case and then use the compressed air to clear the dust from any dust filters. Any obvious collections of dust at the bottom of the case can be wiped away or if you’re very careful a vacuum might also do the job.
- If you know how to remove your components, it can be a good idea to remove everything from the case and remove any dust using short bursts of air.
- Before you put your system back together, we recommend doing some cable management to ensure that there is a cleaner passage of air running through your system. You could also pressurise your case so that you minimise the amount of dust that will build up before your next clean.
 You could also pressurise your case so that you minimise the amount of dust that will build up before your next clean.
Cleaning your system
- A great way to clean up the inside of your computer is to delete any files that you don’t use anymore or even save them on a USB drive or cloud storage. This will free up a lot of space on your PC.
- Most PCs come with preinstalled programmes which can take up a lot of space and slow your PC down. Remove any programmes or apps that you never use.
- It’s always a good idea to clear your browser history, cache and cookies. Clearing your browser history every now and again is important so your browser doesn’t hold on to too much information.
- Emptying the trash is recommended after you have deleted lots of files. But remember, once the trash is emptied any files in the trash will be gone forever.
- Reinstalling Windows is a great way to speed up your PC and to get rid of any malware or systematic problems on the PC. Remember to back up your personal data before reinstalling Windows.
 Remember to back up your personal data before reinstalling Windows.
Conclusion
Cleaning your gaming system isn’t the most exciting part of gaming, but it is a necessity if you want to keep your system running at peak performance and prevent it from overheating. If your computer was overheating before, you’ll notice that it’s a thing of the past after a good cleaning. The extra time that you take to clean up the inside and outside of your gaming PC will ensure that it’s running at maximum capacity and thus will improve your gaming experience. We recommend cleaning your computer every three to six months to keep the performance up and increase your machine’s overall lifespan.
#KingstonFURY #KingstonIsWithYou
5:12
How to clean off PC dust AND free up disk space
How to physically clean dust from your computer and delete old files you no longer need from your drives.
2:51
Windows 10 Disk clean up
We’ll show you how to do things like empty the recycle bin, move file to an external drive, run Disk Cleanup and disable Hibernate. More available disk
4:15
Free up disk space on your Mac
If you need more space, whether it’s to upgrade to a new version of MacOS or to download more apps – we’re here to help you out.
4:46
How to format a hard drive or SSD to erase it forever!
Learn how to erase SSDs, hard drives or any other storage media so that the data is really gone forever.
Search by Memory Product Line
- ValueRAM
- Server Premier
- Kingston FURY
Filter
Filters
Applied
Sort by
Default
Load More
No products were found matching your selection
The best programs for cleaning up a computer disk
Almost any user of Windows 10, 8.1 or Windows 7 sooner or later faces the task of cleaning the computer, or rather its disk from various kinds of garbage – temporary data, remnants of uninstalled programs and other unnecessary files. Many of these tasks can be done manually, but there are free programs for cleaning your computer of junk files that are available on almost every system.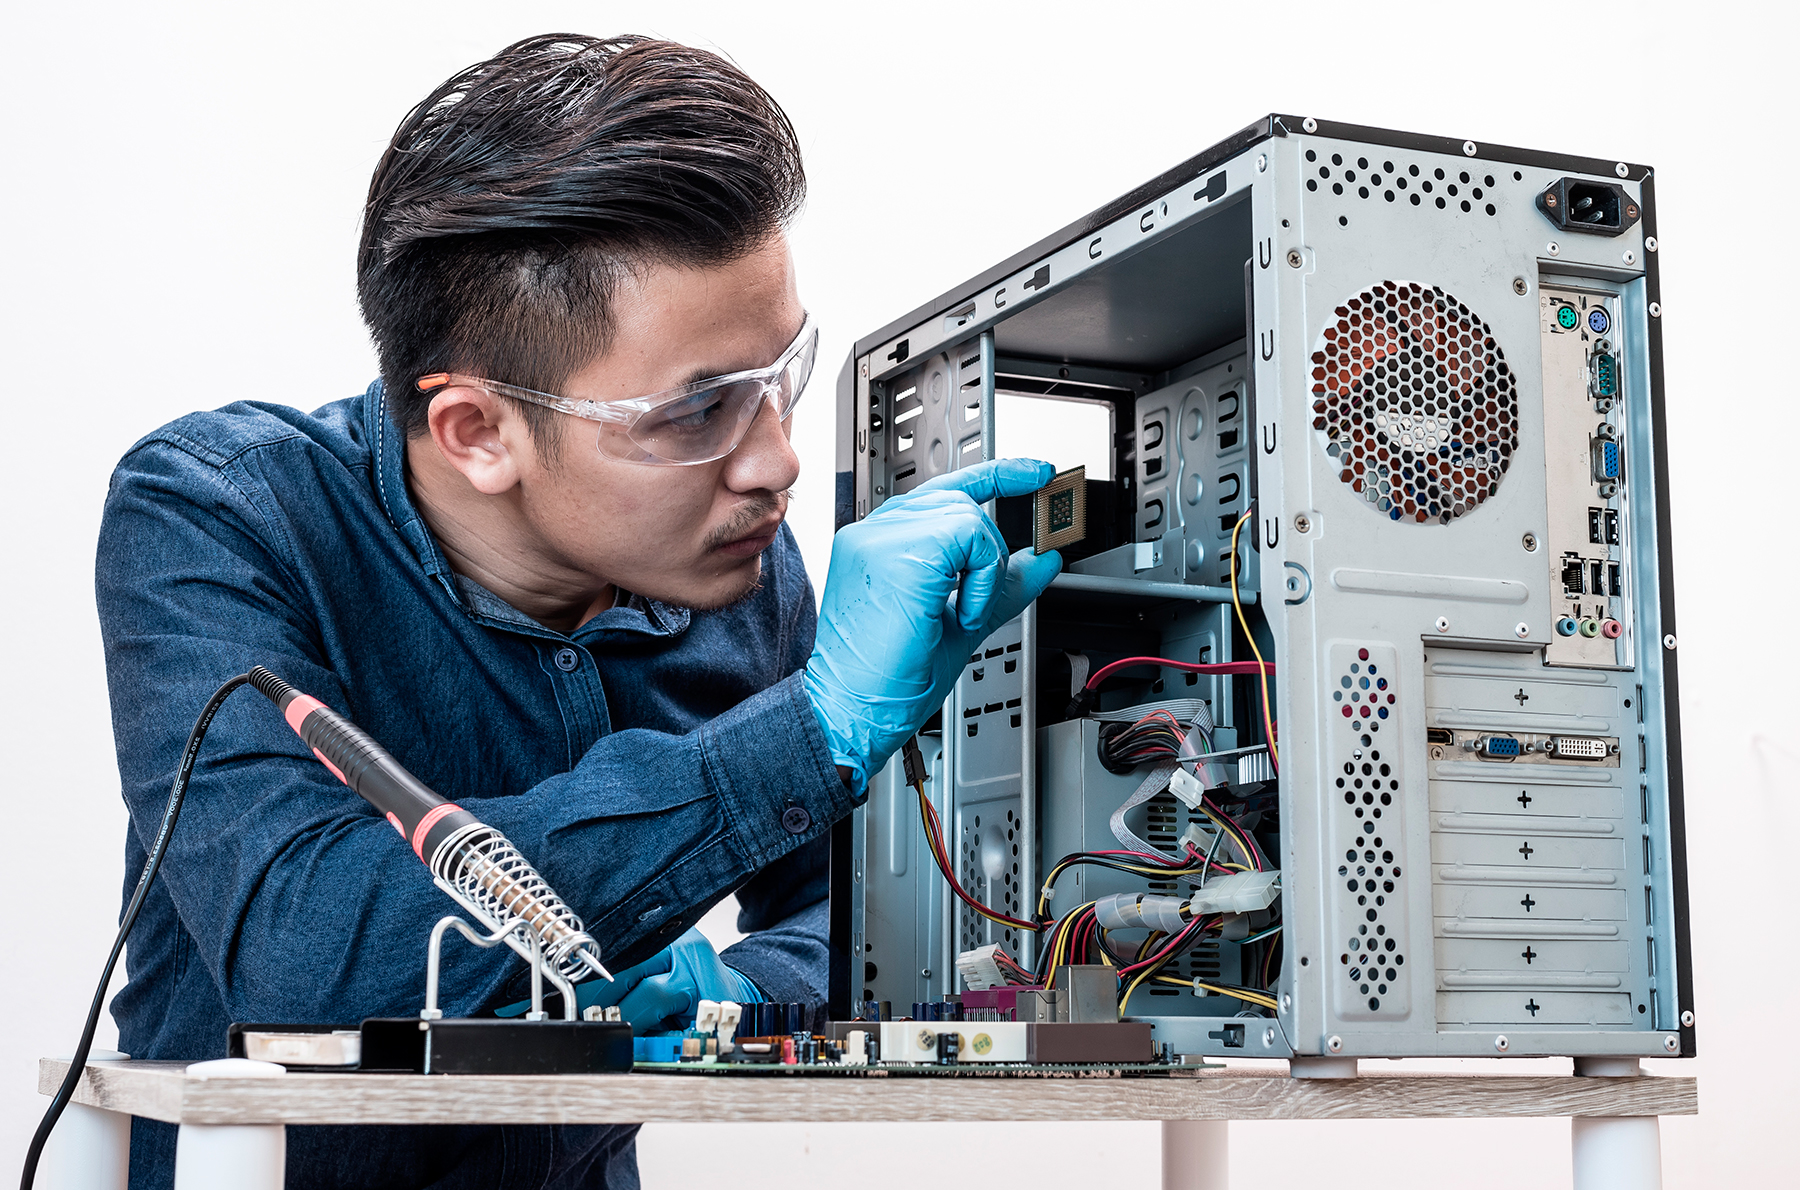
In this review – the best free and shareware programs for cleaning your computer from unnecessary files and other garbage, information about the features and functions of programs. You will also find a video test of 14 disk cleanup programs for Windows 10, 8.1 and Windows 7 and additional materials related to manually cleaning the C drive (system drive) of a computer.
- Free computer cleaners
- Windows 10, 8.1 and Windows 7 built-in disk cleanup
- Dism++
- Privazer
- CleanMgr+
- Bulk Crap Uninstaller
- Debotnet
- Bleachbit
- Free Windows cleaners (but licenses required to access all features)
- CCleaner
- Advanced SystemCare
- Auslogics BoostSpeed
- CleanMyPC
- Kerish Doctor
- Glary Utilities
- Ashampoo WinOptimizer
- Video: test 14 disk cleaners
- Read more about computer cleanup
Free computer cleanup software
Let’s start with programs that allow you to use Disk Cleanup features completely free of charge and do not require a license to access the features. Many of them are little known to the user, but often they turn out to be no less effective than paid counterparts.
Built-in Disk Cleanup Windows 10, 8.1 and Windows 7
The first in the list is the built-in utility “Disk Cleanup” present in all current versions of Windows. Perhaps it is less effective than third-party programs (although this can be argued, I recommend watching the video testing below), but it has one important advantage – its use is almost always safe, even for the most novice user.
Using the built-in disk cleanup can be reduced to the following steps:
- Press the Win+R keys on your keyboard (Win is the Windows logo key), type cleanmgr and press Enter.
- Disk Cleanup opens. If you need to clear unnecessary system files (update files, the Windows.old folder, and others), click the corresponding button in the utility’s interface.
- Check the items that you want to remove, click OK and wait for the computer disk cleanup to complete.

In Windows 10, in addition to running the utility manually, you can use an additional interface to automate the process, among other things. Read more: Automatic Disk Cleanup in Windows 10.
Dism++
Dism++ is a completely free utility in Russian, the main function of which is to provide a graphical interface for Windows functions implemented through dism.exe, but it also has many additional functions. Including a very effective disk cleaning of unnecessary files, reducing the WinSxS folder and other options for removing garbage from the computer.
If you have not tried this program before, I recommend that you do so. In detail not only about cleaning, but also about other tools in the instructions Free program Dism++ for tuning and cleaning Windows.
Privazer
Privazer is another free disk cleanup program for Windows 10, 8.1 and Windows 7 with very high efficiency, automatic scheduled cleaning options, and uses built-in OS tools in addition to its own system cleanup mechanisms.
The program interface is in Russian, and the option to display the interface is available for both a beginner and an experienced user. Details on usage in the review of Privazer – Free Disk Cleanup Software for Windows 10, 8.1 and Windows 7.
CleanMgr+
CleanMgr+ is a kind of advanced built-in computer cleaning utility that we covered in the first part of this article with a lot of options and cleaning options, for example, it is available to clean Windows Component Store (WinSxS), game data, clipboard and other locations.
The program is in English and requires the user to understand the actions being performed – some of them can theoretically lead to unexpected consequences. Official website of CleanMgr+ – https://www.mirinsoft.com/cleanmgrplus
Bulk Crap Uninstaller
The free program Bulk Crap Uninstaller (Russian language available) is designed primarily to remove unnecessary built-in Windows 10 applications, and it does this, perhaps better than analogues, allowing you to uninstall not one at a time, but in groups , immediately evaluate the disk space that will be freed up, create scripts to remove a group of programs on other computers without installing the program.
Learn more about the functions of the utility and its additional features in the article Removing unwanted Windows 10 programs in Bulk Crap Uninstaller.
Debotnet
Debotnet is another rather complicated utility for a novice user with a wide variety of Windows 10 configuration and optimization functions, which also includes tools for cleaning the computer disk.
Some of the cleaning functions (cleaning up junk files) are used by the Privazer and CleanMgr+ programs mentioned above, some are related to the removal of unnecessary programs and have their own implementation. More about the features of the program: Debotnet is a free utility for cleaning and optimizing Windows 10.
Bleachbit
Bleachbit is a completely free program for cleaning up the disk from unnecessary files not only in Windows, but also in Linux. Its most interesting feature is the ability to create and add your own items for cleaning by writing appropriate scripts.
Details about the program and its features: Disk Cleanup in the free program Bleachbit.
Free Windows Cleaning and Optimization Programs
This section is about programs that offer free use, but at the same time limit functions without purchasing the appropriate license and, at times, constantly remind you of this or have a time limit.
CCleaner
First on the list is CCleaner , not because it’s the best of its kind, but rather because of its wide popularity. CCleaner contains tools for removing potentially unnecessary Windows and browser data, software removal tools, including uninstalling built-in applications.
In addition, a number of additional tools are available:
- Disc content analysis
- Search for duplicate files
- Browser plug-in management
- Startup program management
- Permanently delete data from a disk
Like all programs in this section, CCleaner can perform automatic disk cleanup on a schedule, but this is not a feature that I would recommend to most users.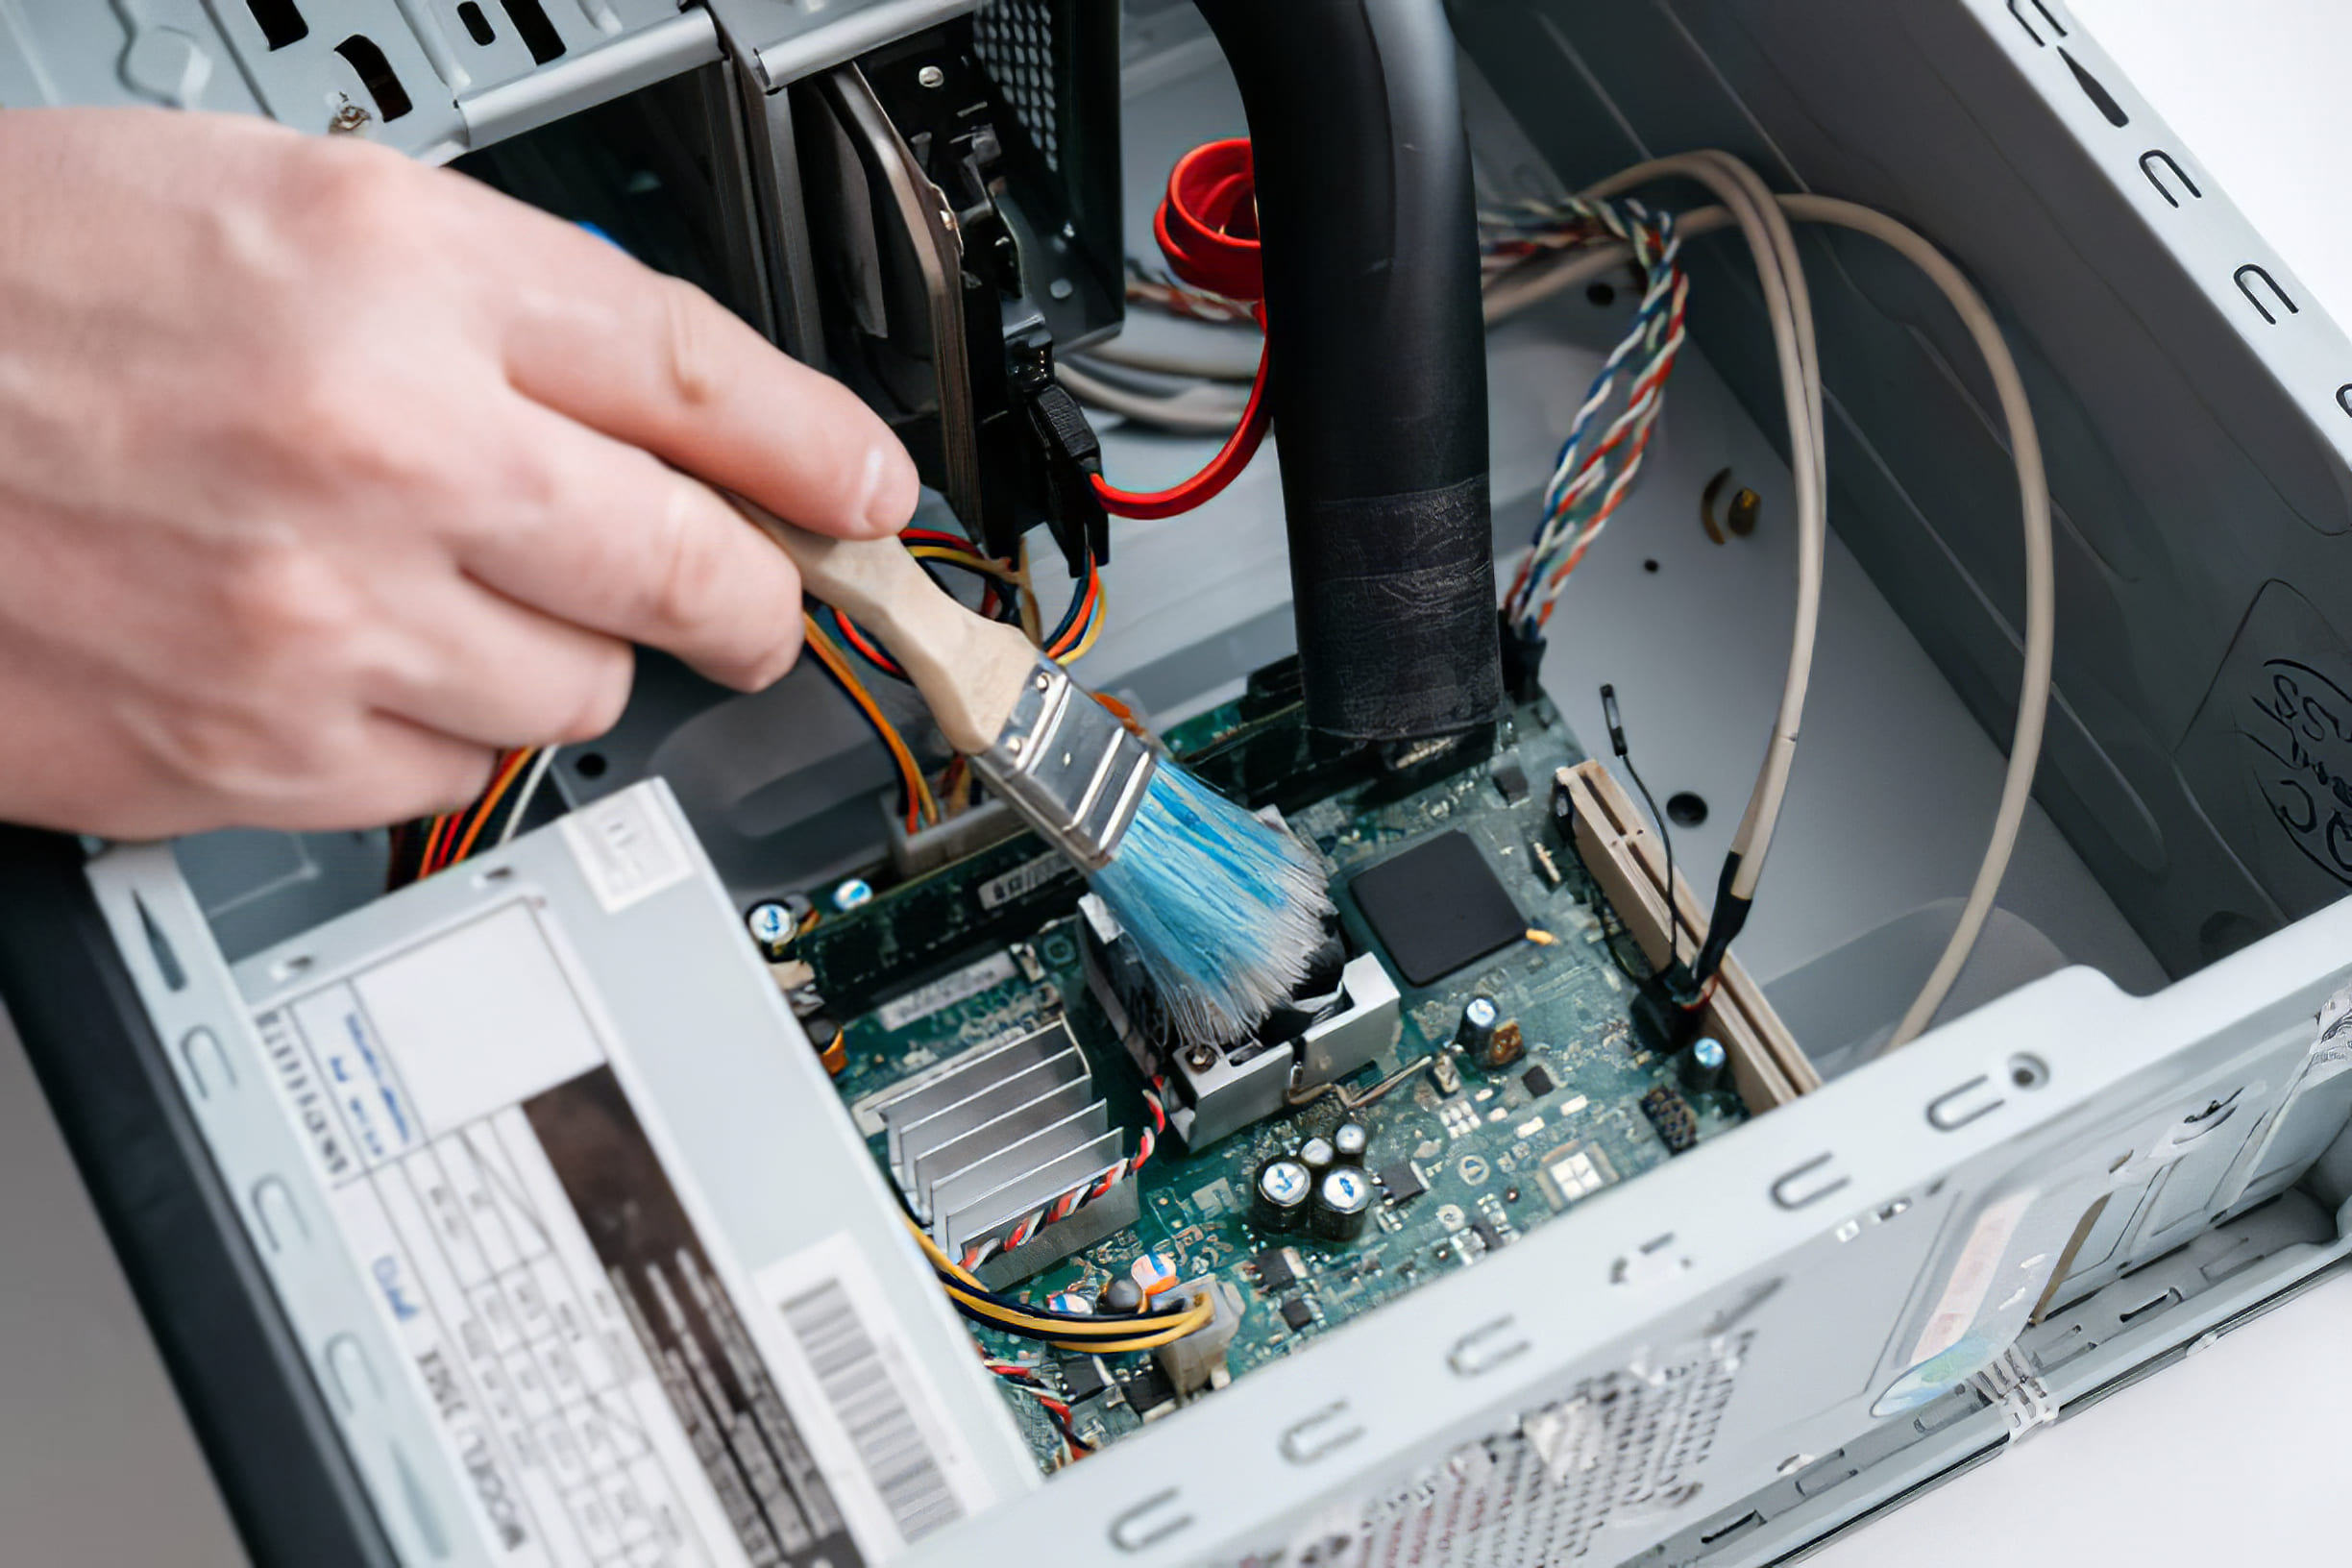
The functions of CCleaner themselves are easy to understand and safe, but in recent years the reputation of the program has deteriorated somewhat and I cannot recommend it directly. One way or another, more about the program, its download and additional information in a separate article Using CCleaner with benefit.
Advanced SystemCare
IOBit Advanced SystemCare is another computer or laptop disk cleaner with extensive advanced Windows optimization features and a controversial reputation.
The advantage of the program is its understandability for a wide range of users, an extensive set of built-in PC cleaning and optimization tools, a set of additional tools, many of which are really useful.
If a few years ago I strongly discouraged installing software from IOBit, today I’m not so categorical: their programs have become more “sparing” to the user, but, in my opinion, marketing is still in abundance. More about Advanced System Care, cleaning and optimization features, my review.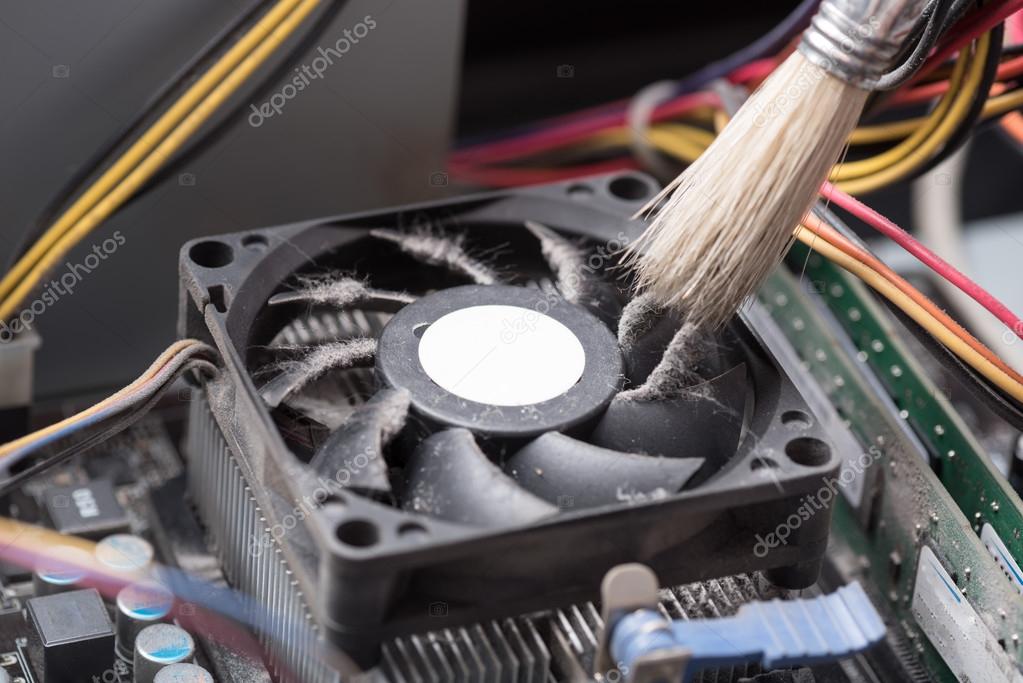
Auslogics BoostSpeed
Auslogics BoostSpeed is probably the most functional of the programs listed here and really very effective (which was confirmed by the test, which can be seen in the video review, where BoostSpeed was in first place). Most of the features are free to use.
Cleanup options include simple disk cleanup of junk files, shrinking the Windows folder, duplicate file search, built-in uninstaller, and many other disk cleanup and system optimization tools.
Of the shareware programs, I would give my preference to this particular program. Of the shortcomings, I see only the potential insecurity of some functions for novice users, and therefore I strongly recommend having system restore points (even when cleaning, the utility in question does not delete the last restore points). You can download Auslogics BoostSpeed from the official website https://www.auslogics.com/ru/software/boost-speed/download/
CleanMyPC
CleanMyPC is a Windows PC cleaner from the developers of one of the most popular cleaning tools for Mac. From CleanMyMac migrated here, first of all, one of the best and most understandable interfaces for novice users.
And program tools, in addition to cleaning the computer from unnecessary files – an uninstaller, privacy settings, the ability to delete files without the possibility of recovery, managing browser extensions, maintaining the registry (I would not recommend doing registry cleaning functions without first creating a system restore point).
It is difficult to draw a definite conclusion about the program. CleanMyPC is a simple computer cleaning tool for novice users. I can’t note outstanding efficiency, on the other hand, the use of the present features is unlikely to cause problems (which theoretically can be allowed when using more powerful analogues). You can download CleanMyPC from the official website https://macpaw.com/cleanmypc
Kerish Doctor
Kerish Doctor – a set of tools for computer maintenance, including disk cleaning tools:
- Delete unnecessary files and empty folders.
- Search for duplicate files and the largest files on the disk.
- Software Uninstaller
If we talk only about cleaning up the computer’s disk, Kerish Doctor is far from the most effective program. If we consider this software as a comprehensive set of tools for fine-tuning and managing various elements of Windows 10, 8.1 and Windows 7 – there is nothing to complain about, then what you see in the next screenshot is only a part of the available useful functions.
Kerish Doctor can be downloaded from the official website https://www.kerish.org/ru/ — a free trial period without functionality limitation will last 15 days after installation.
Glary Utilities
Glary Utilities is a relatively little-known program among Russian users, on the other hand it is of interest – almost all functions can be used for free, the program is completely in Russian, and the set of potentially useful tools is worthy of attention.
If we take into account only the results of automatic cleaning of the computer disk, they cannot be called outstanding. If you look at all the available features of the program in the aggregate, perhaps it is worth a try.
You can download Glary Utilities from the official site https://www.glarysoft.com/glary-utilities/ (the default site is in English, the program itself is entirely in Russian).
Ashampoo WinOptimizer
I’m running out of words to describe very similar software products. Ashampoo WinOptimizer is the next program that, if you only evaluate the degree of effectiveness of cleaning your computer from garbage, there is nothing too remarkable.
However, if you look at the full list of additional Windows optimization and tuning features above, you might want to try them in action. Official website of the developer – https://www.ashampoo.com/ru/rub
Test 14 Disk Cleanup Software – Video
 youtube.com/embed/p8u3iYwXAYM” loading=”lazy” frameborder=”0″ allowfullscreen=”allowfullscreen”/>
More about cleaning up your computer from unnecessary files
Finally, a few additional site materials that can help you further clean up the system disk of your PC or laptop:
- How to disable Windows 10 reserved storage (and clean up about 7 GB).
- How to clear the Driverstore\FileRepostory folder (up to a few GB)
- How to delete temporary files in Windows 10
- How to clean drive C from unnecessary files
- Best uninstaller programs (programs for uninstalling programs)
- Programs for finding duplicate files
- How to find out what is taking up disk space
- How to increase the C drive using the D drive (attention: inept resizing of partitions may cause problems when loading Windows).
remontka.pro in Telegram | Subscription methods
Dism++ program to customize Windows
There are many relatively little-known free programs among our users that allow you to conveniently configure Windows 10, 8.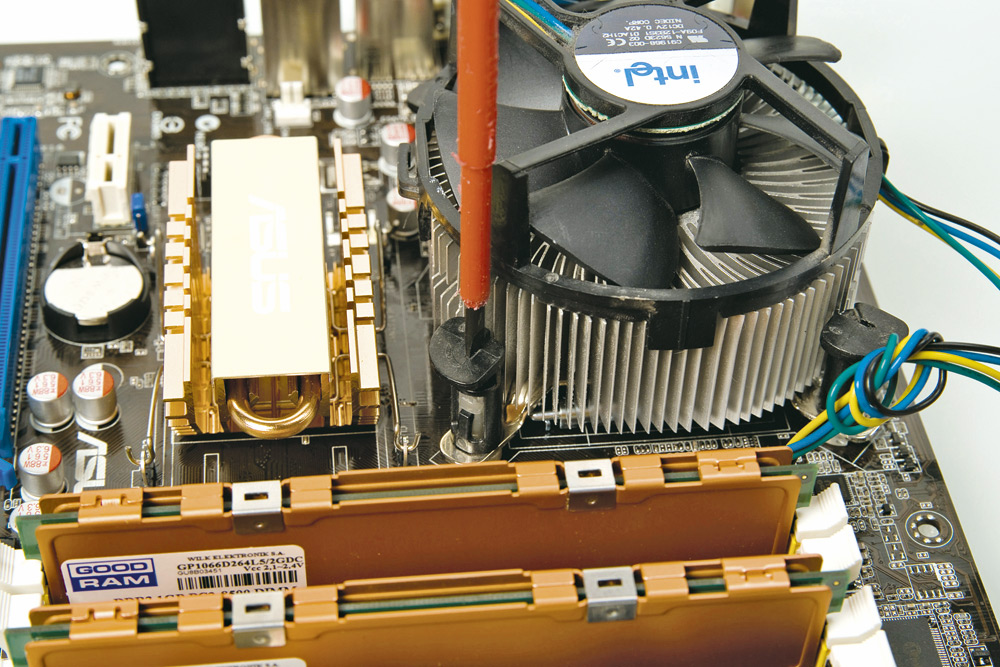 1 or Windows 7 and offer additional tools for working with the system. This manual is about Dism++, one of those programs. Another utility that I recommend for review is Winaero Tweaker.
Dism++ is designed as a graphical interface for the built-in Windows system utility dism.exe, which allows you to perform various actions related to system backup and restore. However, this is not all the features available in the program.
Dism++ functions
The Dism++ program is available with the Russian interface language, and therefore there should be no difficulties when using it (except, perhaps, some functions that are incomprehensible to a novice user).
The program features are divided into sections “Tools”, “Control Panel” and “Deployment”. For the reader of my site, the first two sections will be of greatest interest, each of which is divided into subsections.
Most of the presented actions can be performed manually (the links in the description lead to just such methods), but sometimes it is much more convenient to do this using a utility where everything is collected and works automatically.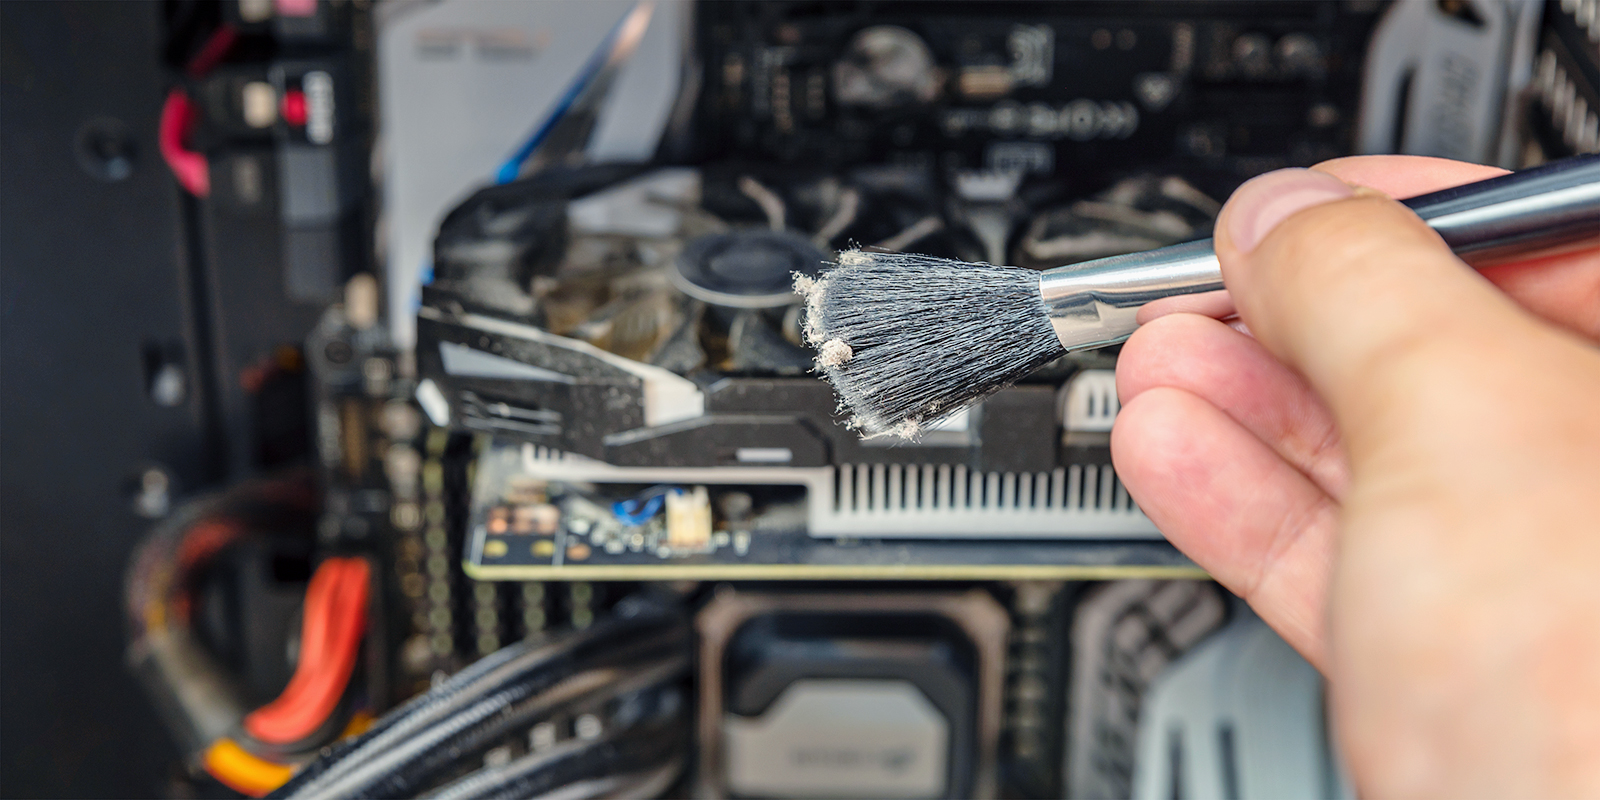
Tools
The tools section contains the following options:
- Cleanup – allows you to clean up Windows system folders and files, including reducing the WinSxS folder, removing old drivers and temporary files. To see how much space you can free up, check the items you want and click Analyze.
- Boot management – here you can enable or disable startup items from different system locations, as well as configure the startup mode of services. In doing so, you can view system and user services separately (disabling the latter is usually safe).
- Manage Appx – Here you can uninstall Windows 10 apps, including built-in apps (on the Preinstalled Appx tab). See How to uninstall built-in apps in Windows 10.
- More is perhaps one of the most interesting sections with options for Windows backup and recovery, allowing you to restore the bootloader, reset the system password, convert ESD to ISO, create a Windows To Go flash drive, edit the hosts file and more.

Please note that in order to work with the last partition, especially with the functions of restoring the system from a backup, it is better to run the program in the Windows recovery environment (more on this at the end of the instructions), while the utility itself should not be located on the disk that is being restored or from bootable flash drive or disk (you can simply place the folder with the program on a bootable Windows flash drive, boot from this flash drive, press Shift + F10 and enter the path to the program on the USB drive).
Control Panel
This section contains subsections:
- Optimization – settings for Windows 10, 8.1 and Windows 7, some of which can be configured without programs in “Settings” and “Control Panel”, and for some – use Registry Editor or Local Group Policy. Among the interesting things: removing context menu items, disabling automatic installation of updates, removing items from the Explorer quick access panel, disabling SmartScreen, disabling Windows Defender, disabling the firewall, and others.
- Drivers – a list of drivers with the ability to get information about its location, version and size, remove drivers.
- Applications and Features is an analogue of the same section of the Windows Control Panel with the ability to uninstall programs, view their sizes, enable or disable Windows components.
- Features is a list of additional Windows system features that can be removed or installed (check Show All to install).
- Updates – list of available updates (on the Windows Update tab, after parsing) with the option to get the URL for the update, and installed packages on the Installed tab with the option to uninstall the updates.
Additional features of Dism++
You can find some additional useful program options in the main menu: Dism.exe and was described in the instruction Checking the integrity of Windows system files.